> ## Documentation Index
> Fetch the complete documentation index at: https://docs.vervecopilot.com/llms.txt
> Use this file to discover all available pages before exploring further.
# Layout settings
> Configure default layout and response mode for new interview sessions
## Overview
Configure your preferred starting view and response mode so every new Interview Copilot session launches with your ideal setup. No need to reconfigure layout or mode settings each time—set it once and your preferences are automatically applied.
**How to access:** Click the **settings gear icon** on the [copilot launch page](https://www.app.vervecopilot.com/copilot), then select the **Layout** tab
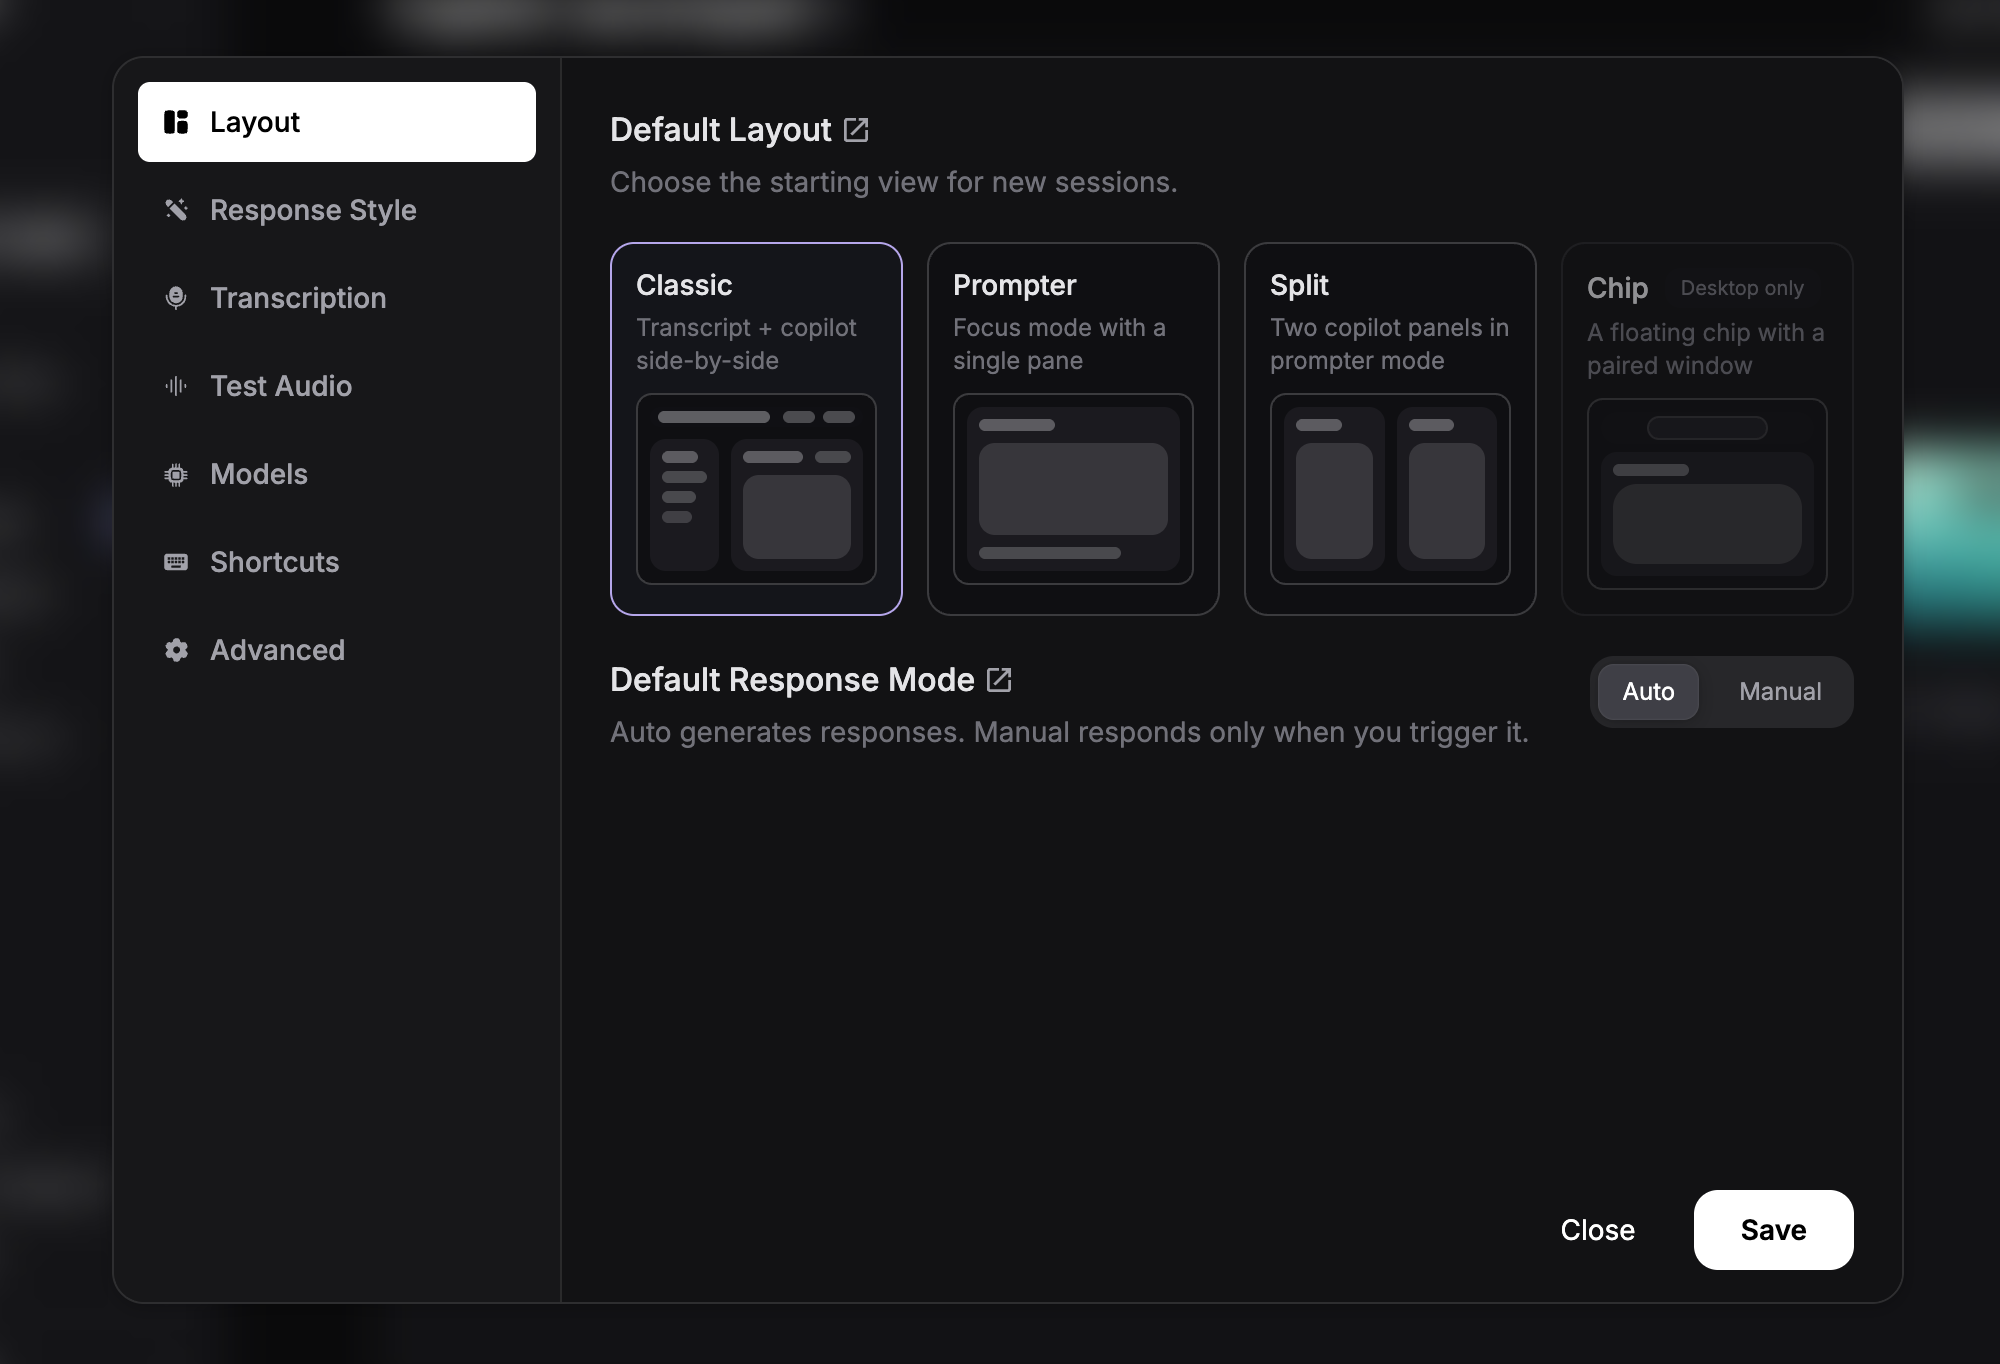 The settings modal has multiple tabs: **Response Style** for customizing AI prompts, and **Layout** for configuring default view and mode settings. [Learn about Custom Response Style →](/features/custom-response-style)
***
## Default Layout
Choose the starting view for new copilot sessions. This determines how the interface is organized when you first launch the copilot.
### Chip Layout *(Desktop only)*
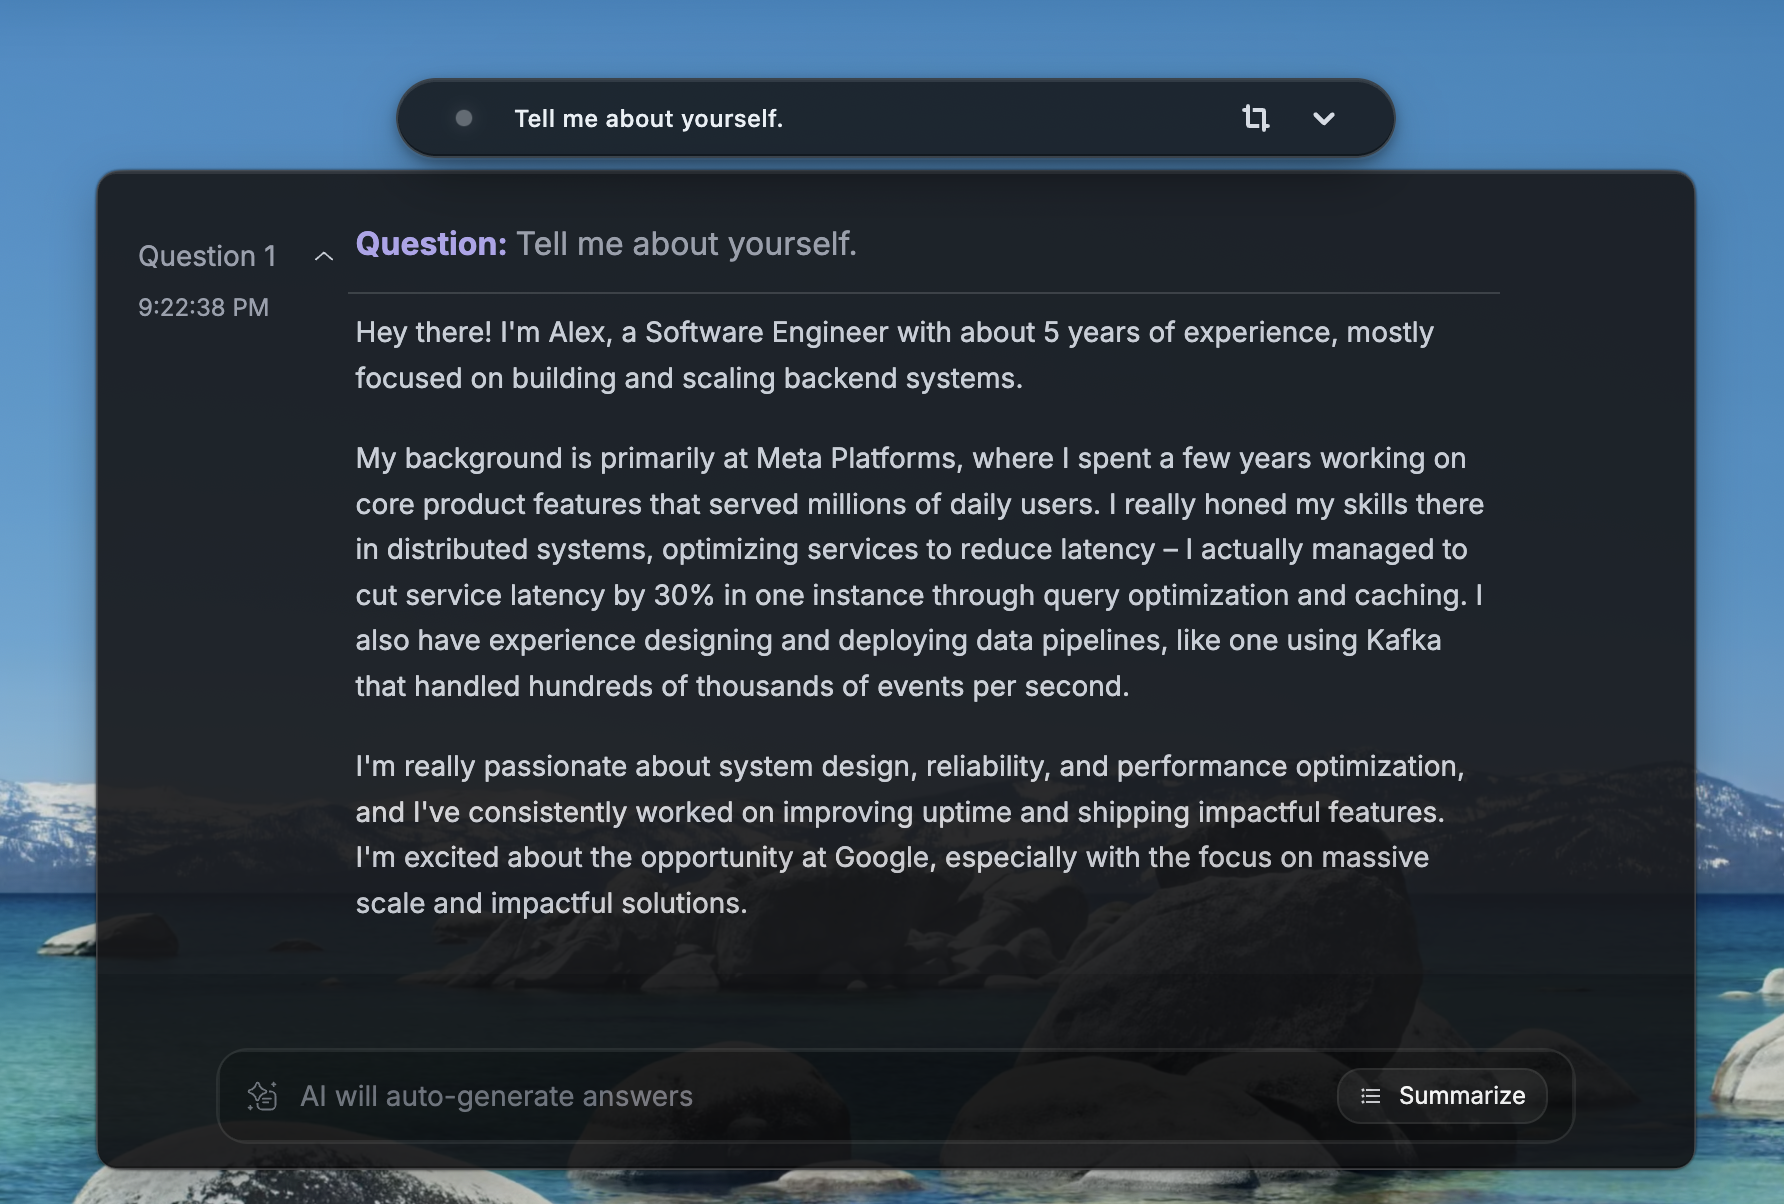
A native floating chip paired with a compact response window. Lightweight, stays out of the way, and blends into your workflow.
The settings modal has multiple tabs: **Response Style** for customizing AI prompts, and **Layout** for configuring default view and mode settings. [Learn about Custom Response Style →](/features/custom-response-style)
***
## Default Layout
Choose the starting view for new copilot sessions. This determines how the interface is organized when you first launch the copilot.
### Chip Layout *(Desktop only)*
A native floating chip paired with a compact response window. Lightweight, stays out of the way, and blends into your workflow.
 ### Classic Layout
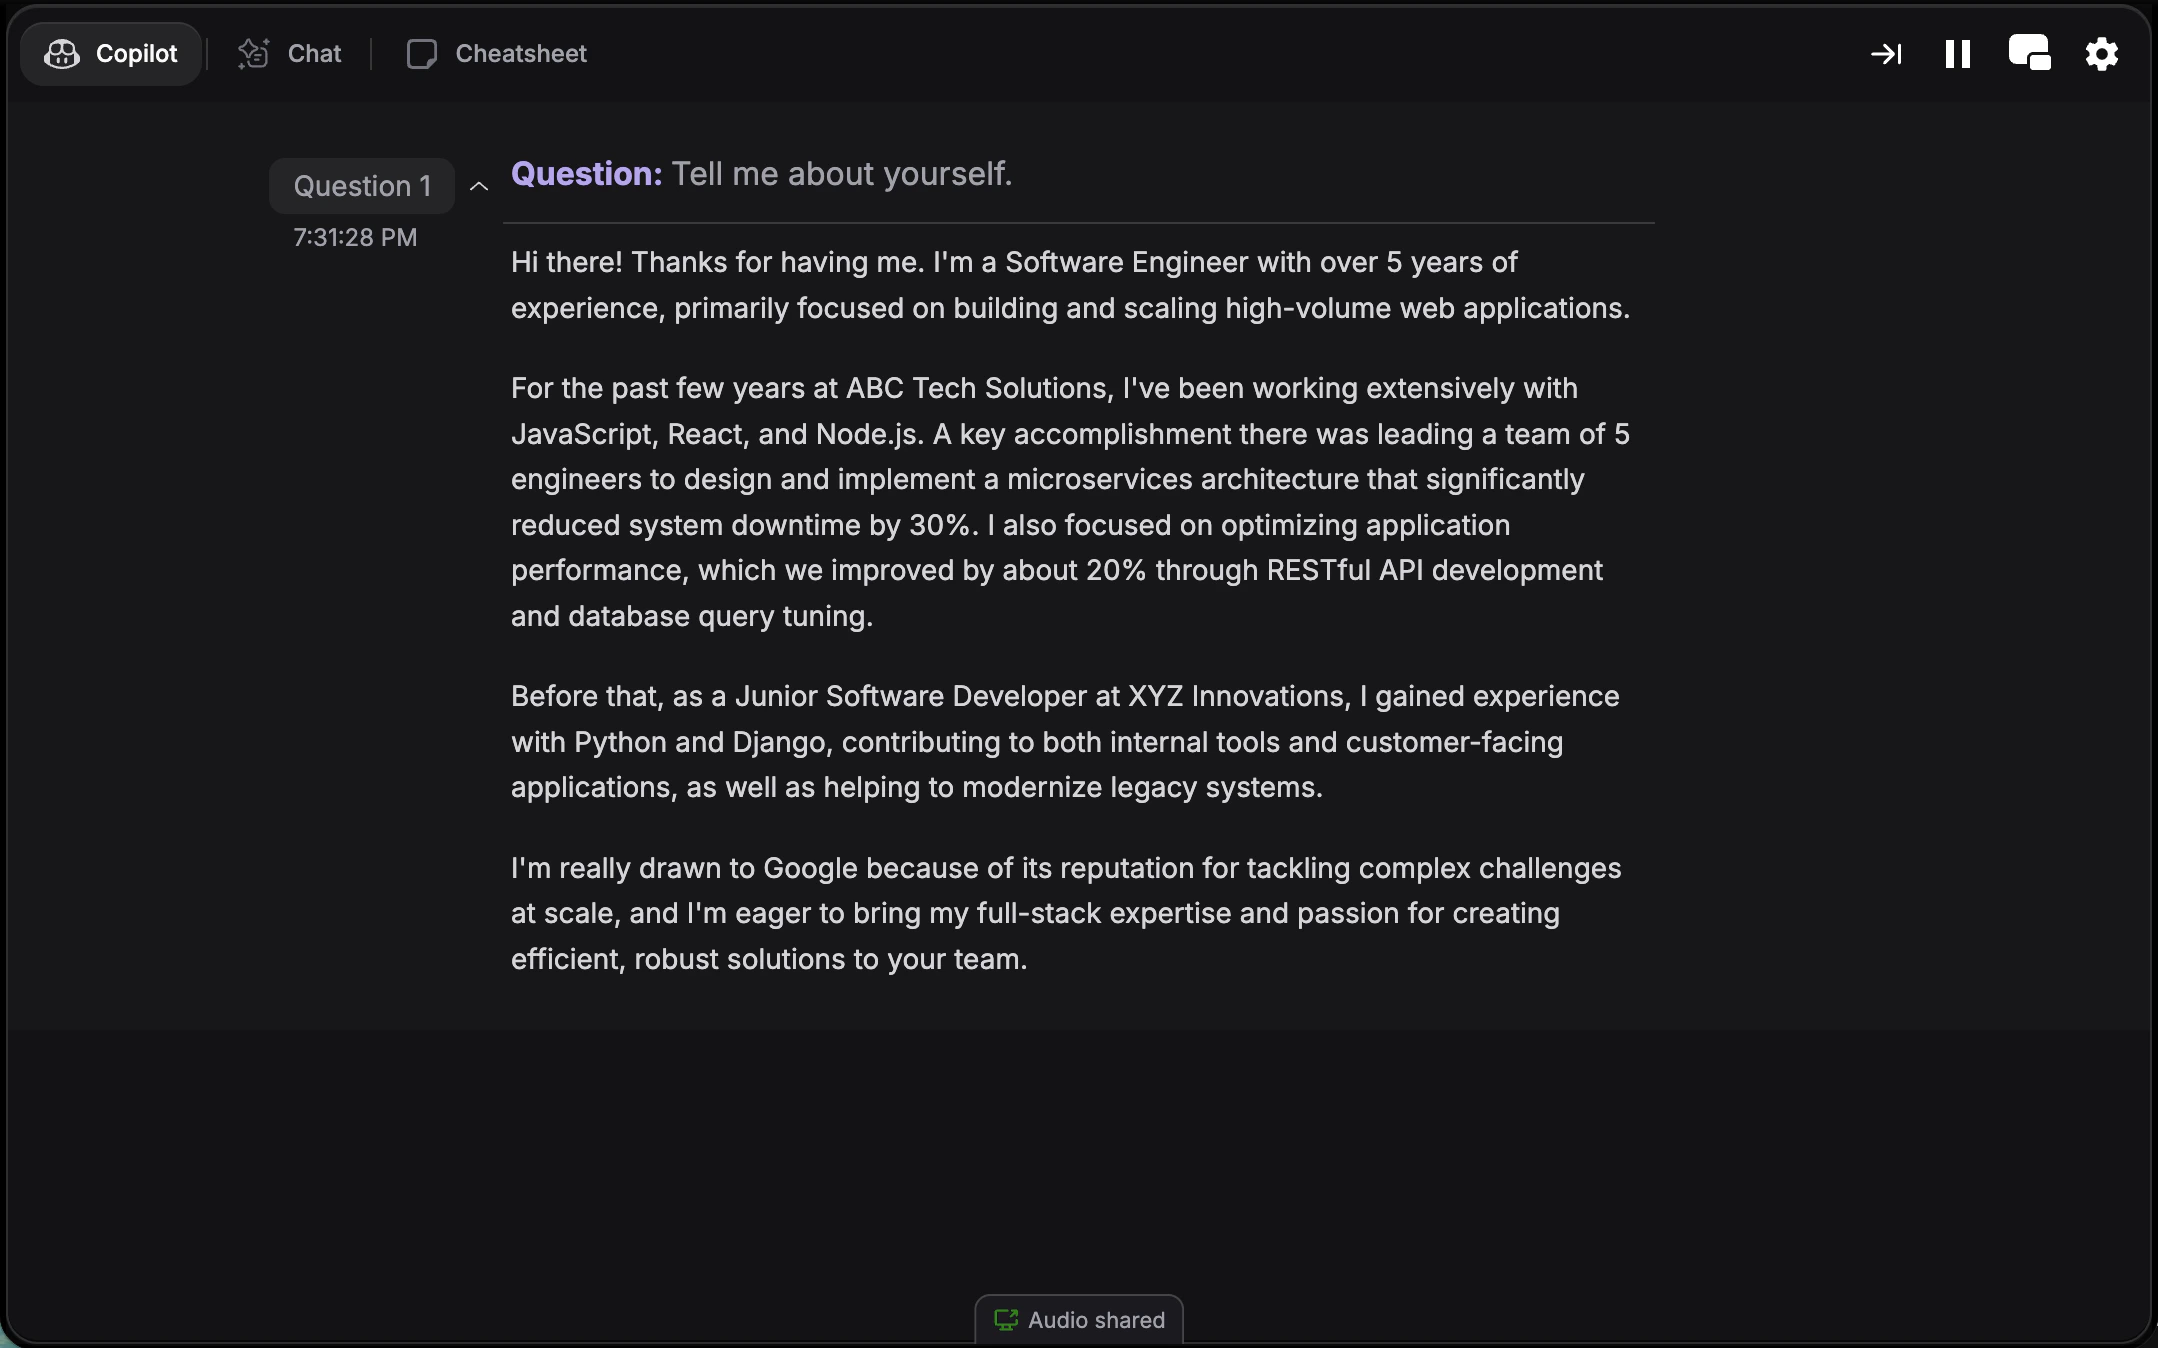
Transcript on the left, copilot responses on the right. Best for following the conversation and checking transcription accuracy in real time.
### Classic Layout
Transcript on the left, copilot responses on the right. Best for following the conversation and checking transcription accuracy in real time.
 ### Prompter Layout
A single-pane focus view that hides the transcript and maximizes space for copilot responses.
### Prompter Layout
A single-pane focus view that hides the transcript and maximizes space for copilot responses.
 ### Split Screen Layout
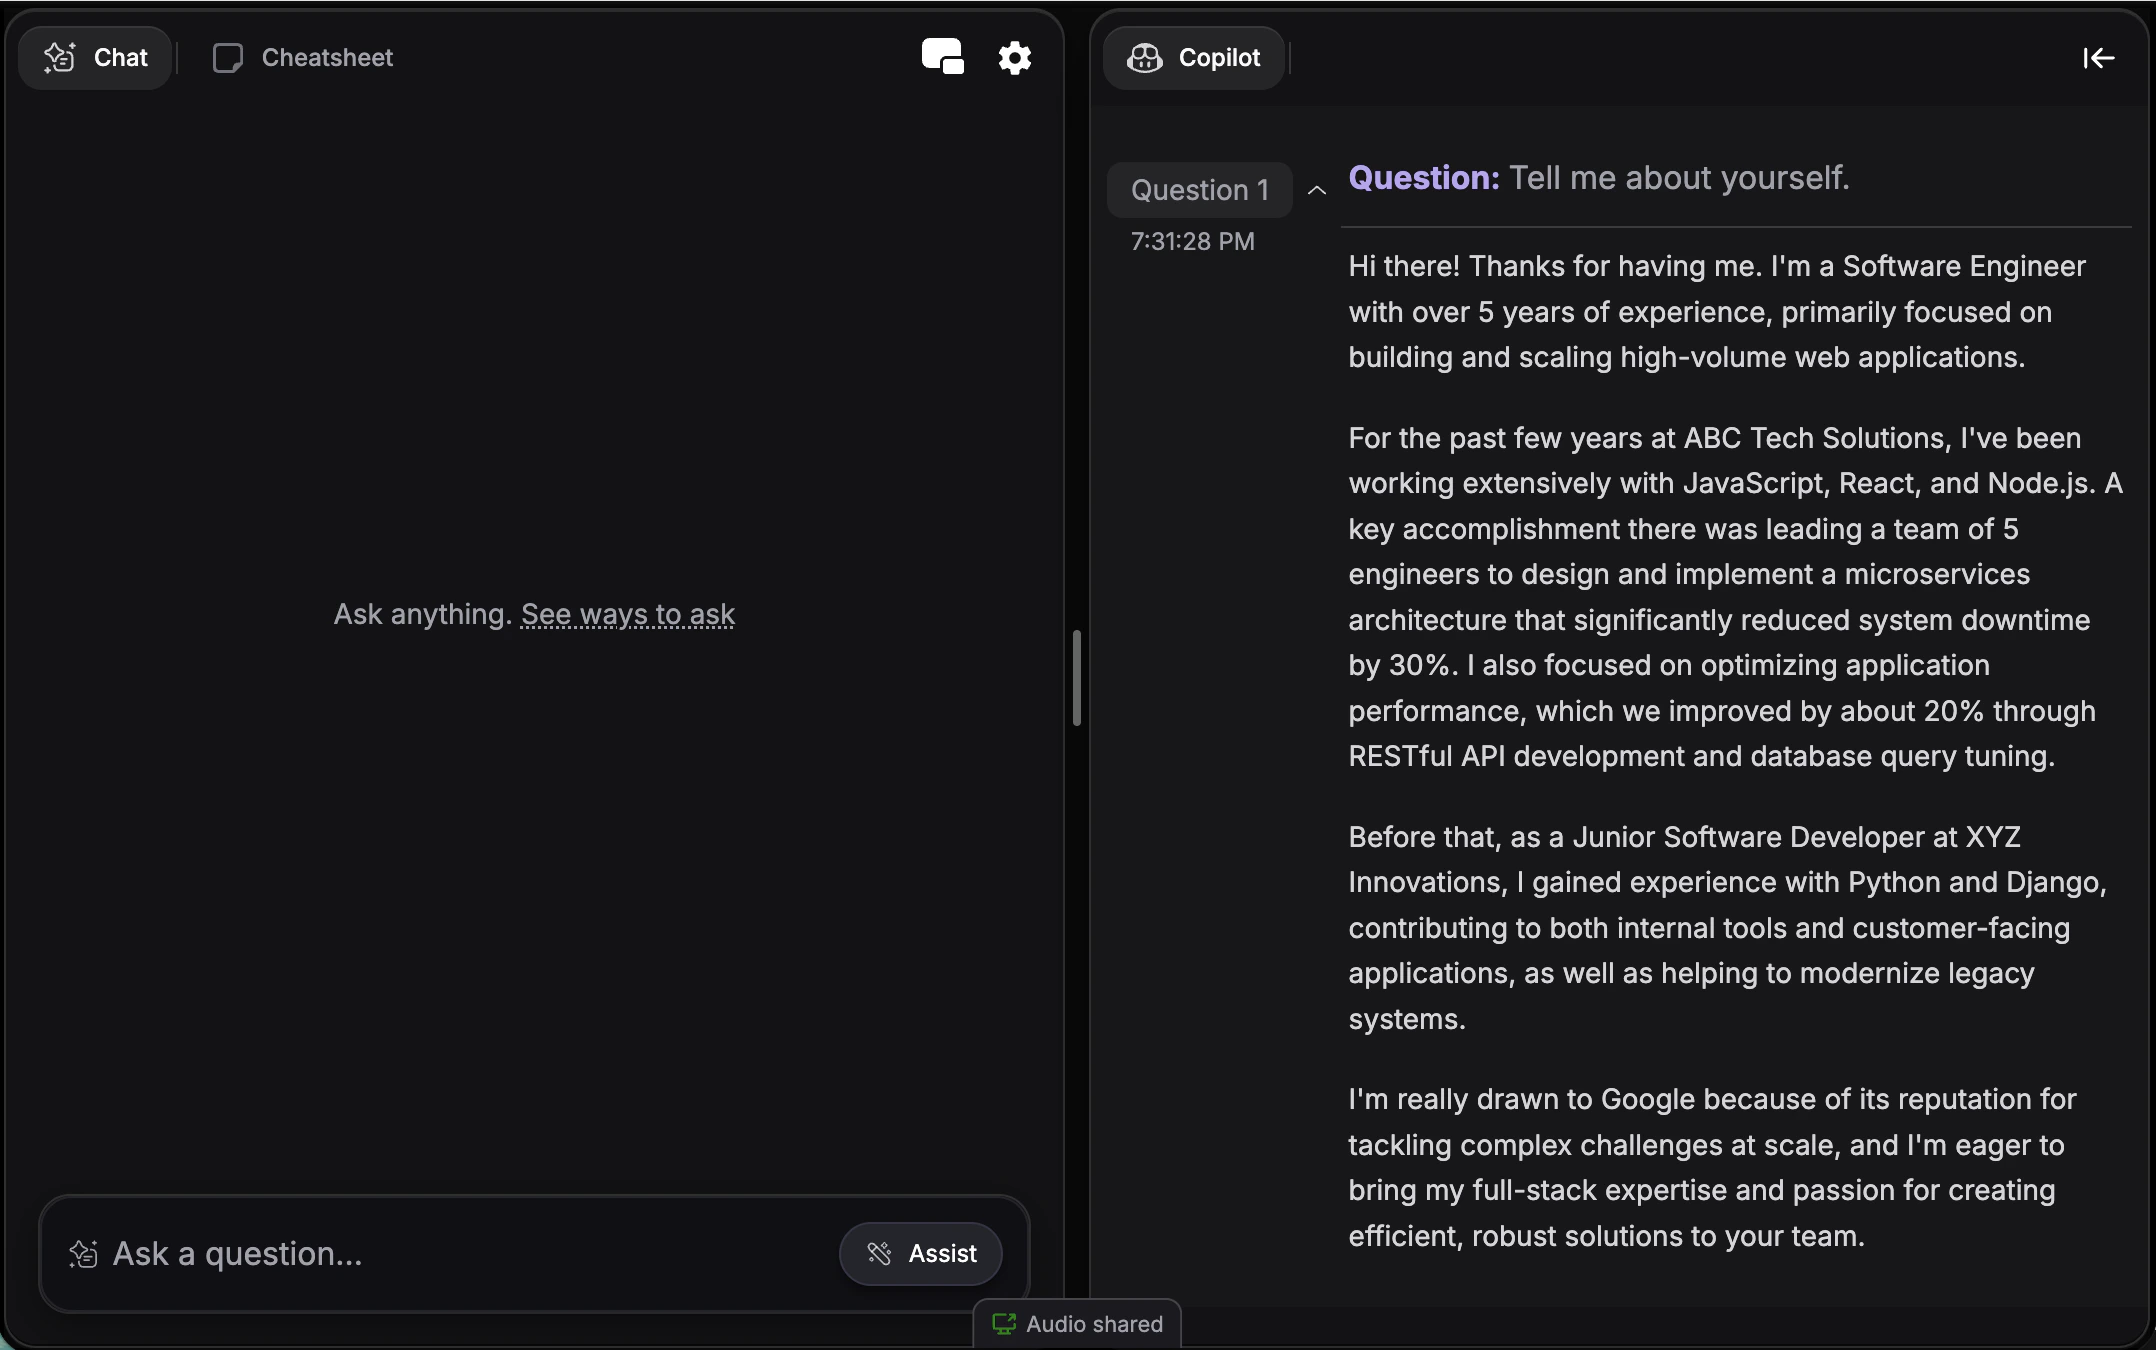
Two copilot panels side-by-side without the transcript—e.g. Copilot + Chatbot. Similar to [Split Screen Mode](/guides/split-screen-mode), but as your default.
### Split Screen Layout
Two copilot panels side-by-side without the transcript—e.g. Copilot + Chatbot. Similar to [Split Screen Mode](/guides/split-screen-mode), but as your default.
 These are default settings for new sessions only. You can always change layout and response mode during active interviews using hotkeys.
***
## Default Response Mode
Control how the copilot generates responses in new sessions. This setting determines whether responses appear automatically or only when you trigger them.
### Auto Mode (Default)
Responses generate automatically when the interviewer finishes speaking. Fully hands-free experience with real-time suggestions.
**Best for:**
* Fast-paced interviews where you need instant support
* Hands-free workflow during screen sharing
* When you want continuous, automatic guidance
### Manual Mode
Responses generate only when you explicitly request them using Cmd + Enter (Mac) or Ctrl + Enter (Windows). Transcription runs continuously in the background.
**Best for:**
* Multi-part questions where you want to wait for the complete question
* Strategic control over when suggestions appear
* Reducing cognitive load by choosing when to reference the copilot
Learn more about when and how to use each mode in our [Manual Mode guide](/features/manual-mode).
***
## How to Configure Default Settings
Go to the [copilot launch page](https://www.app.vervecopilot.com/copilot) and click the **settings gear icon**.
In the settings modal, choose the **Layout** tab to access default preferences.
Select your preferred starting layout:
* **Chip** *(desktop only)* - Floating chip with a paired window
* **Classic** - Transcript + copilot side-by-side
* **Prompter** - Focus mode with a single pane
* **Split** - Two copilot panels in prompter mode
Select your preferred response behavior:
* **Auto** - Generates responses automatically
* **Manual** - Responds only when you trigger it
Your preferences are saved automatically. Launch a new copilot session to see your defaults applied.
***
## How to Change Settings During a Session
Your default settings apply when you **start** a session. Once the interview is active, you can still adjust layout and mode on the fly:
### Switch Response Mode
Press Cmd + M (Mac) or Ctrl + M (Windows) to toggle between Auto Mode and Manual Mode during the interview.
[Learn more about auto/manual modes →](/features/manual-mode)
### Activate Split Screen
Press Cmd + / (Mac) or Ctrl + / (Windows) to toggle Split Screen Mode, which lets you view multiple tabs side-by-side.
[Learn more about Split Screen Mode →](/guides/split-screen-mode)
### Navigate Between Tabs
Use Tab and Shift + Tab to rotate through Support, Copilot, Cheatsheet, and Chatbot tabs.
[View all keyboard shortcuts →](/features/keyboard-shortcuts)
***
## Message Direction
Control the order in which messages appear in the copilot interface. You can choose between two message flow directions based on your preference.
**How to access:** Go to **Copilot Parameters → Advanced** in your settings
These are default settings for new sessions only. You can always change layout and response mode during active interviews using hotkeys.
***
## Default Response Mode
Control how the copilot generates responses in new sessions. This setting determines whether responses appear automatically or only when you trigger them.
### Auto Mode (Default)
Responses generate automatically when the interviewer finishes speaking. Fully hands-free experience with real-time suggestions.
**Best for:**
* Fast-paced interviews where you need instant support
* Hands-free workflow during screen sharing
* When you want continuous, automatic guidance
### Manual Mode
Responses generate only when you explicitly request them using Cmd + Enter (Mac) or Ctrl + Enter (Windows). Transcription runs continuously in the background.
**Best for:**
* Multi-part questions where you want to wait for the complete question
* Strategic control over when suggestions appear
* Reducing cognitive load by choosing when to reference the copilot
Learn more about when and how to use each mode in our [Manual Mode guide](/features/manual-mode).
***
## How to Configure Default Settings
Go to the [copilot launch page](https://www.app.vervecopilot.com/copilot) and click the **settings gear icon**.
In the settings modal, choose the **Layout** tab to access default preferences.
Select your preferred starting layout:
* **Chip** *(desktop only)* - Floating chip with a paired window
* **Classic** - Transcript + copilot side-by-side
* **Prompter** - Focus mode with a single pane
* **Split** - Two copilot panels in prompter mode
Select your preferred response behavior:
* **Auto** - Generates responses automatically
* **Manual** - Responds only when you trigger it
Your preferences are saved automatically. Launch a new copilot session to see your defaults applied.
***
## How to Change Settings During a Session
Your default settings apply when you **start** a session. Once the interview is active, you can still adjust layout and mode on the fly:
### Switch Response Mode
Press Cmd + M (Mac) or Ctrl + M (Windows) to toggle between Auto Mode and Manual Mode during the interview.
[Learn more about auto/manual modes →](/features/manual-mode)
### Activate Split Screen
Press Cmd + / (Mac) or Ctrl + / (Windows) to toggle Split Screen Mode, which lets you view multiple tabs side-by-side.
[Learn more about Split Screen Mode →](/guides/split-screen-mode)
### Navigate Between Tabs
Use Tab and Shift + Tab to rotate through Support, Copilot, Cheatsheet, and Chatbot tabs.
[View all keyboard shortcuts →](/features/keyboard-shortcuts)
***
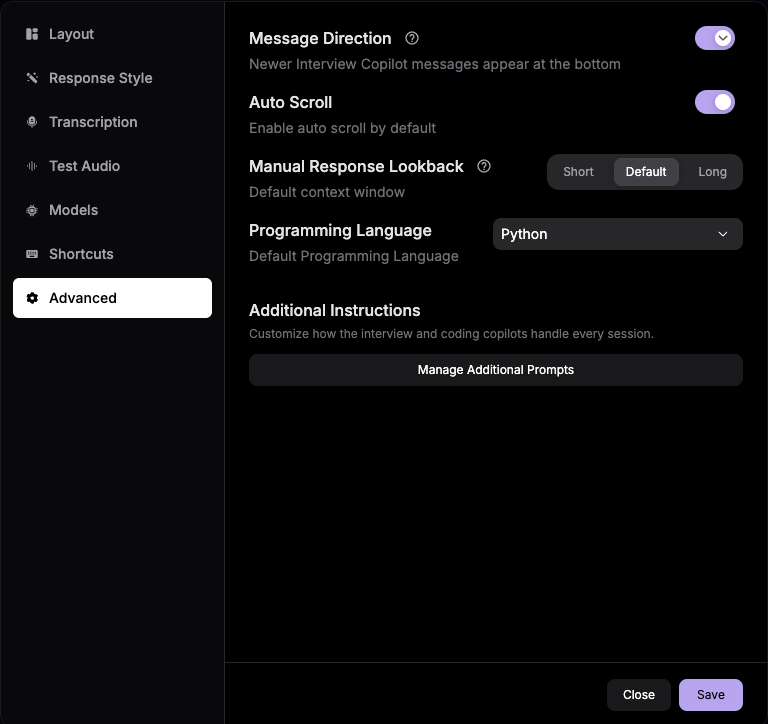
## Message Direction
Control the order in which messages appear in the copilot interface. You can choose between two message flow directions based on your preference.
**How to access:** Go to **Copilot Parameters → Advanced** in your settings
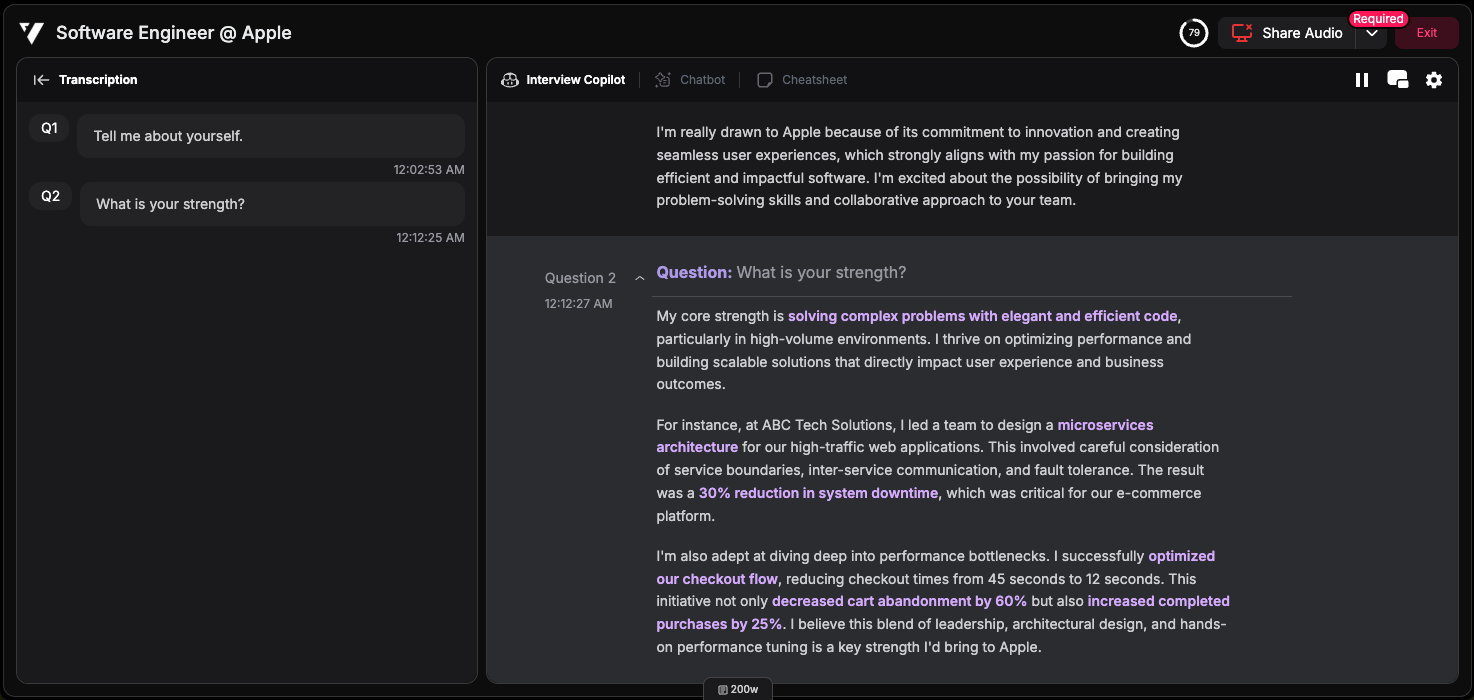
 ### Top to Bottom (Newer Messages at Bottom)
Messages flow from top to bottom, with the newest messages appearing at the bottom of the screen—similar to traditional chat applications.
### Top to Bottom (Newer Messages at Bottom)
Messages flow from top to bottom, with the newest messages appearing at the bottom of the screen—similar to traditional chat applications.
 **Best for:**
* Users familiar with standard chat applications
* When you prefer scrolling down to see the latest messages
* Natural reading flow from top to bottom
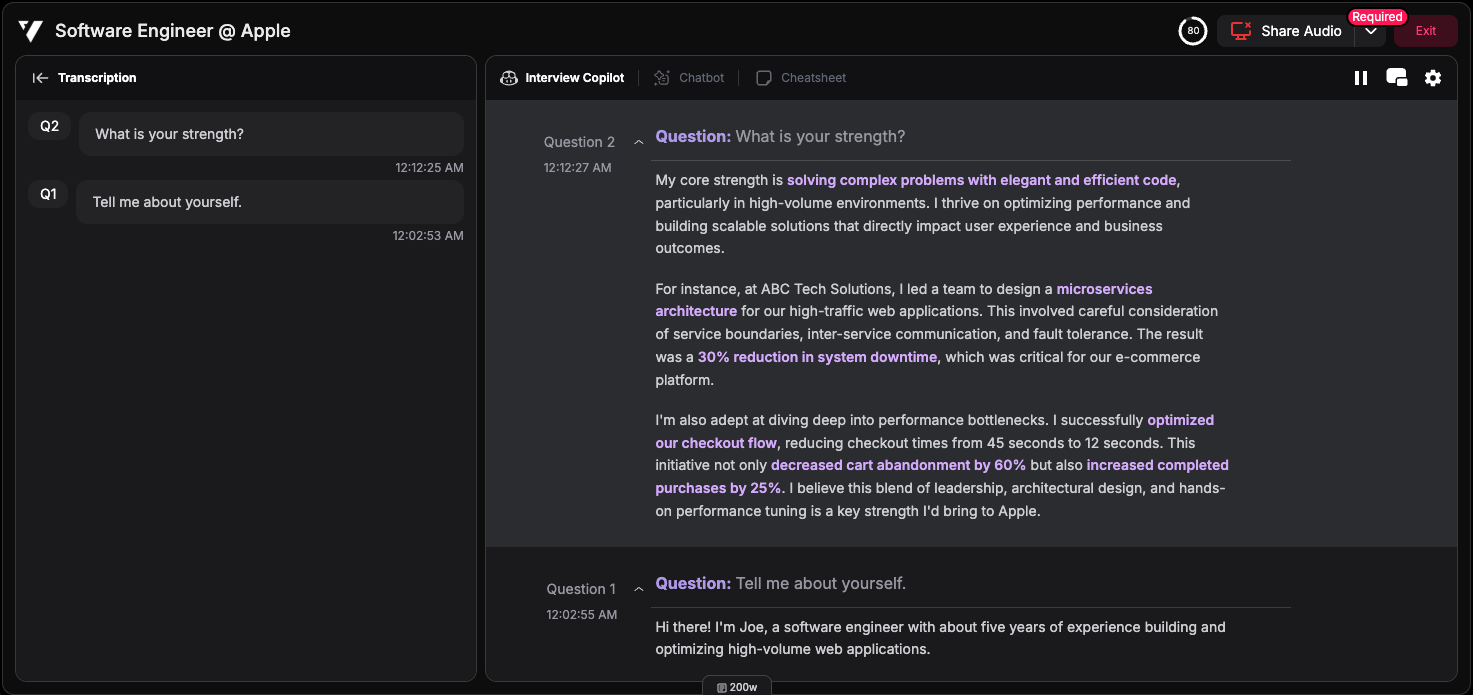
### Bottom to Top (Newer Messages at Top)
Messages flow from bottom to top, with the newest messages appearing at the top of the screen—ideal for quick glances at the most recent content.
**Best for:**
* Users familiar with standard chat applications
* When you prefer scrolling down to see the latest messages
* Natural reading flow from top to bottom
### Bottom to Top (Newer Messages at Top)
Messages flow from bottom to top, with the newest messages appearing at the top of the screen—ideal for quick glances at the most recent content.
 **Best for:**
* Quick access to the latest messages without scrolling
* Teleprompter-style reading experience
* Users who prefer newest information immediately visible
**Best for:**
* Quick access to the latest messages without scrolling
* Teleprompter-style reading experience
* Users who prefer newest information immediately visible